Tag Archives: Oracle
Performing a 12c Upgrade with a New Install
Software updates often include new features, and while useful, these new features are often the only driving factors in upgrading software. There's no harm in wanting to play around with the shiny new toy but many software updates also include much more significant changes, such as resolving bugs or security vulnurabilities.
In fact, bug fixes and security patches are usually released on a more frequent schedule than new feature sets. These changes are necessary to maintain a healthy environment. For this reason, Rittman Mead usually suggests environments are always as up to date as possible with the current releases available.
OBIEE 12.2.1.1 was released this past summer, and it seems to have resolved many issues that plagued early 12C adopters. Recently, OBIEE 12.2.1.2 was also released, resolving even more issues with the early 12C versions. With all of the improvements and fixes available in these versions, an upgrade plan should be a priority to anyone currently on one of the earlier releases of 12c (especially 12.2.1.0).
Okay, so how do I upgrade?
Spencer McGhin has already posted a fantastic blog going over how to perform an in-place upgrade for the 12.2.1.1 release. Even though it was for the previous release, the process is very similar. For those interested in reading a step by step guide, or looking to see what would go into the process, I would suggest reading his post here.
However, with OBIEE 12C's new BAR files, we could take another approach to performing an upgrade. Instead of the traditional "in-place" upgrades, we could perform an upgrade using a different process. We could simply perform a brand new install of this OBIEE version and migrate the existing content using a variety of tools Oracle provides us.
If you choose to "upgrade" your environment by performing a fresh install, implementing the upgrade process will comprise of exporting the required files from OBIEE, removing the old version of OBIEE (if you are using the same machine), installing the new version of OBIEE, and then deploying the previously exported content. This process resembles that of a migration, and can be thought of that way, but migrating between 12C environments seems to be much simpler than migrating to a 12C environment from an older environment.
So an upgrade process could instead look like a brand new installation of the new OBIEE version, and then the execution of a handful of commands provided by Oracle to return the environment to its previous state.
But what would we gain from following this process, rather than a traditional in-place upgrade?
It's worth noting that either approach requires careful planning and testing. Performing a brand new install does not remove the necessity of planning an upgrade process, gathering requirements, identifying all content that must be migrated, testing the installation, testing the migration, and user acceptance and validation testing. The proper process should never be ignored, regardless of the implementation method.
Is there any advantage to a fresh install?
For starters, you won't need to pollute your system with old or deprecated scripts/directories. In Spencer's aforementioned blog, he found that after his upgrade process he had to maintain a second middleware home directory. If you upgrade your environment throughout the years, you may end up with hundreds of unused/deprecated scripts and files. Who enjoys the thought that their environment is full of old and useless junk? A fresh install would cull most of these superfluous and defunct files on a regular basis.
Additionally, there is the occasional bug that seems to reappear in upgraded environments. These bugs usually appear to be from environments that were patched, and then upgraded to a new version, which causes the previously fixed bug to reappear. While these bugs are fixed in future patches, fresh installs are usually free from these kind of issues.
Finally, I would argue a fresh installation can occasionally be simpler than performing the upgrade process. By saving response files used in an installation, the same installation can be performed again extremely easily. You could perform an install in as little as three lines, if not fewer:
/home/oracle/files/bi_platform-12.2.1.2.0_linux64.bin -silent -responseFile /home/oracle/files/obiee.rsp
/home/oracle/Oracle/Middleware/Oracle_Home/oracle_common/bin/rcu -silent -createRepository -databaseType ORACLE -connectString localhost:1521/ORCL -dbUser sys -dbRole sysdba -schemaPrefix DEV -component BIPLATFORM -component MDS -component WLS -component STB -component OPSS -component IAU -component IAU_APPEND -component IAU_VIEWER -f < /home/oracle/files/db_passwords.txt
/home/oracle/Oracle/Middleware/Oracle_Home/bi/bin/config.sh -silent -responseFile /home/oracle/files/configure_obiee.rsp
If this is the case, you can just save the response files set up during the first installation, and reuse them to install each new OBIEE version. Of course the required response file structure could change between versions, but I doubt any changes would be significant.
How do I migrate everything over?
So you've chosen to do a fresh install, you've saved the response files for future use, and you have a brand new OBIEE 12.2.1.2 environment up and running. Now, how do we get this environment back to a state where it can be used?
Before performing the upgrade or uninstall, we need to gather a few things from the current environment. The big things we need to make sure we get is the catalog, RPD, and the security model. We may need additional content (like a custom style/skin or deployments on the Weblogic Server, configurations, etc.) but I will ignore those for brevity. To move some these, I expect you would be required to use the WLST.
Catalog, RPD, and Security Model
Lucky for us, the Catalog, RPD, and Security Model are all included in the BAR export we can create using the exportServiceInstance() function in the WLST. You can then import these to a 12C environment using the importServiceInstance() function. Easy enough, right?
Users
If your users are maintained in the embedded Weblogic LDAP, you must export them and then re-import them. This process can be done manually or through the WLST using the Current Management Object.
If users are maintained through an external Active Directory source, then the configurations will be pulled in with the Security Model in the BAR file.
Testing the migration
The final step is, of course, to make sure everything works! And what better way than to use Oracle's new Baseline Validation Tool. This tool is included in OBIEE 12C, and is perfect for testing migrations between environments.
For those unfamiliar, the basic process is this:
- Configure and run the Baseline Validation Tool against your content.
- Perform the upgrade (be sure to preserve the previously gathered test results)!
- Run the Baseline Validation Tool again to gather the new output, and display the compared results.
The output should be an HTML file that, when opened in a browser, will let you know what has changed since the last time it was run. If everything was migrated properly, then there should be no major discrepancies.
Final Thoughts
Is it better to do an in-place upgrade, or a fresh install and migrate current content? The answer, as always, depends on the business. One method adds complexity but allows for more customization possibilities, while the other is likely faster and a more standard approach. Use whichever works for your specific requirements.
It's an interesting idea to install a new version of OBIEE every so often, rather than perform an upgrade, but maybe for some organizations it will simplify the process and alleviate common upgrade issues. If you or your organization are often stuck on older versions of OBIEE because you are uncomfortable or unfamiliar with the typical upgrade process, maybe you can provision an additional environment and attempt this alternative method.
As previously stated, it is imperative for environments to be as up to date as possible, and this method is simply another, albeit unconventional, avenue to make that happen.
Data Visualization Desktop 12.2.2.0: Data Flow Component
My previous post contained a brief description of Data Visualization Desktop (DVD) new features in 12.2.2.0, in terms of sources, visualisations and components. In this post we're going to simulate a typical analyst use case and understand how DVD can support the process.
Data Visualisation Desktop is a tool aimed at departmental analysis, with data coming from different sources and results that need to be delivered quickly. Given the ad-hoc nature of it, traditional long term IT-driven Business Intelligence processes often won’t suffice. In this example we'll have a deep look at DVD's Data Flow component and how it can be used to create an ETL flow in order to analyse data coming from a multitude of sources. Data Flow is new functionality introduced in DVD 12.2.2.0.
Preamble: being Italian I can't avoid talking about football, the example provided in this post will analyse some Serie A data together with some Fantasy Football information in order to understand which players I should choose for my team.
Data Sources
In order to analyse Serie A players I based my research on the following data points:
- Players cost: Excel file containing Team, Role and Fantasy Football Cost for each Serie A player. This file can change match by match since Cost of a single players can vary reflecting his performances.
- Players statistics: CSV files containing players statistics like goal scored, yellow and red cards, assists and fantasy football mark for every match of the current and past season.
For the purpose of the example I'm assuming the Players cost file is an XLSX received manually by the analyst (think at Budget data) and the Players statistics data stored in an Hive table.
Creating Data Sources in DVD
Data Visualization Desktop has a native connector to Hive, so just need to click on "Data Sources", then Create -> Connection and select "Apache Hive". The setup is pretty simple, we need to specify the host, port, username and password of the Hive Server.

The next step is creating a new Data Source and select the newly created "TestHive" as source. The list of Hive's databases and, selecting FantasyFootball, the list of tables are visible.

After clicking on the ff_statistics table we can select and import the columns. There is also an option to check or directly enter the SQL if needed. After clicking OK (and checking that no errors arise) we are ready to use the Hive table.

The "Players Cost" Excel file, received manually by the analyst, can be directly updated using the Data Source -> Create -> Data Source -> File option.

DVD automatically detects the column types and provides a preview of the content

Once the data source is saved we are ready to start manipulating the data.
Data Flow
Our initial goal is to exclude from the statistics table any data quality issues. This could be down to invalid CSVs, as well as players not existing in "Players Cost" file (if they were sold to teams outside Serie A or they stopped their career). To do so we can use the Data Flow option included in DVD and accessible in the Data Source page.

The first step is to select ff_statistics from list of sources, right click and select "Add Step". From the list of options presented we can select Filter and remove all the invalid data by simply only include rows where the "Code" is not empty [null].

The Data Flow chart now includes the Filter component. Following step is to bring in the "Players cost" file in the flow by selecting the Add Data option. Then it's time to join the two sources, we can do that by selecting both them and choosing the Join option.

We can specify the columns which will be used in the joining condition and the join type (inner or outer) by selecting the desired option in the Keep Rows section (between Matching rows or All rows). For the purpose of our analysis we'll keep only the matching rows of the two datasets (inner join) since we are interested in all players listed in Players Cost and having a valid set of statistics in Players Statistics.
Now we can enrich the data set further, by adding derived metrics and attributes:
- Count of Matches: The number of valid matches (having a not null grade) played by so far by each player. This will be used later to filter out all players having less than 10 valid games since those are less likely to play most of the games.
- Role Translation: Roles are specified in Italian, a simple CASE WHEN can translate them in English.
The enrichment can be achieved by creating an additional Add Columns Step and filling properly the formulas.

After filtering out all players with less than 10 valid marks, an Aggregate step can be added to set the aggregation level and methods. The Aggregate step should be included in every Data Flow since it's the unique place where Attribute/Measure and aggregation definitions can be made. A Data Flow without the Aggregation step will provide a default column definition that may result in an unusable output data source.
Finally we can store the end resultset locally in order to proceed with the analysis.

We can now execute the data flow and FantasyFootball is automatically added to the list of DVD's Data Sources. The Data Flow can also be stored in DVD in order to be re-executed when necessary.
Keep in mind that Data Flow works locally on the workstation where DVD is installed, so data extraction and manipulation will generate a load on the system based on the data volume and complexity of the steps.
Project
Before creating a project we can review the resulting FantasyFootball dataset settings and change the Attribute/Measure definition of my Columns as well as the type of aggregation.

As written before it's better to define Attributes/Measures with an Aggregate step in the Data Flow since any setting changed directly in the dataset will be overwritten when the Data Flow is re-executed.
With the data preparation work completed, now is time to start creating a project using the FantasyFootball dataset. As written in my previous post a number of new visualisations is available with DVD 12.2.2.0, some are used in the example below like Chord, Parallel and Sankey diagrams.

Unfortunately I'll not share the details of my findings since those could be used against me in the competition but Hey....that Higuain looks like a good player!
In this post we saw a typical analyst use case, with data coming from multiple sources needing to be joined together and cleansed. All operations done manually via Excel that can now be automated, saved and re-executed with DVD's Data Flow.
Data Visualization Desktop 12.2.2.0
Yesterday Data Visualization Desktop (DVD) Version 12.2.2.0 was released. DVD, since its first release, aims to extend Oracle's Data Visualization portfolio by adding a desktop tool allowing data visualization capabilities directly to end users without the intervention of the IT department, in line with the Gartner's bi-modal IT.
The new version adds several capabilities to the existing product like visualization types, data sources and a wrangling option. This post will share the details of the new release additional features.
Installation
After downloading DVD, the installation is pretty simple, just double click on the Oracle_Data_Visualization_Desktop_V2_12_2_2_0_0.msi file, choose the installation folder and click on "Install".
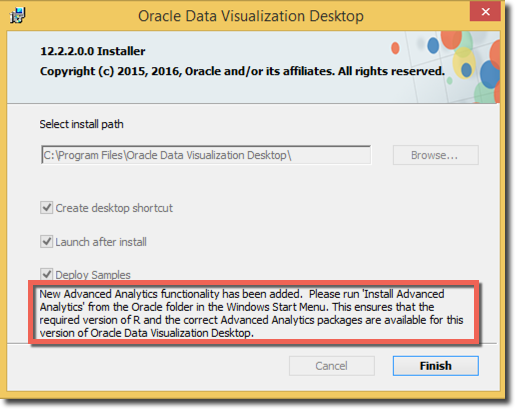
Once the installation is finished, be aware of the message in the last screen, it says that the correct version of R and the set of packages need to be installed in order to be used with DVD for Advanced Analytics. Those can be installed via the "Install Advanced Analytics" file placed in Start Menu -> Programs -> Oracle.
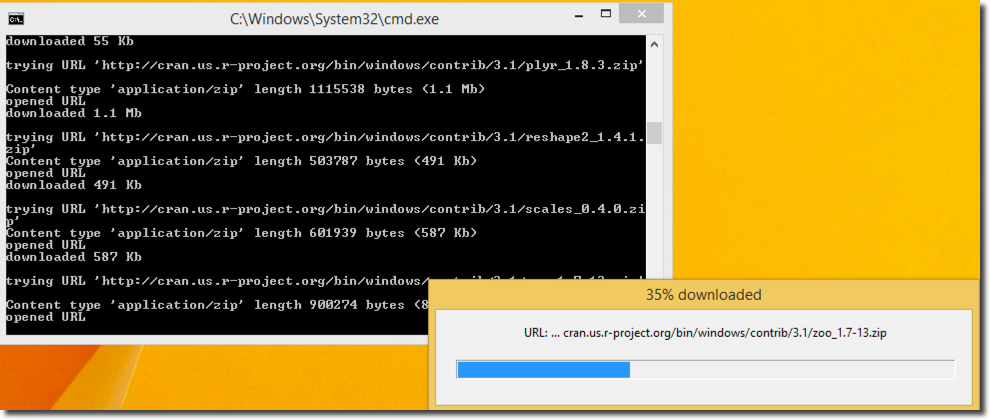
This setup allows to chose the R installation location, installs R and then downloads from cran.us.r-project.org the relevant packages.
New Visualisations
The first set of improvements in the new release is about the new out of the box visualisation, and new set of graphs is now available:
- List: Shows a list of the dimension's values together with a gradient colouring based on the measure selected

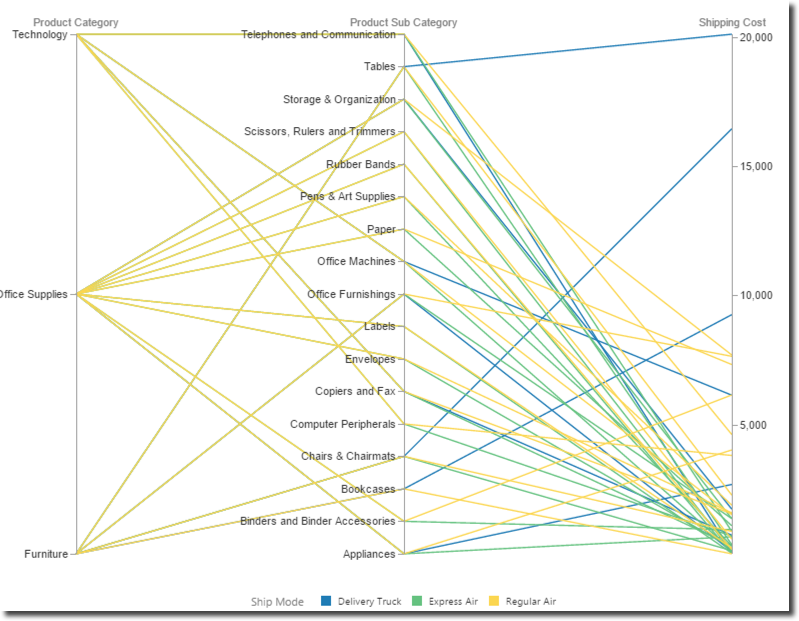
- Parallel Coordinates: Shows multiple dimensions on the same chart enhancing the ability to quickly get an insight about possible connections between them
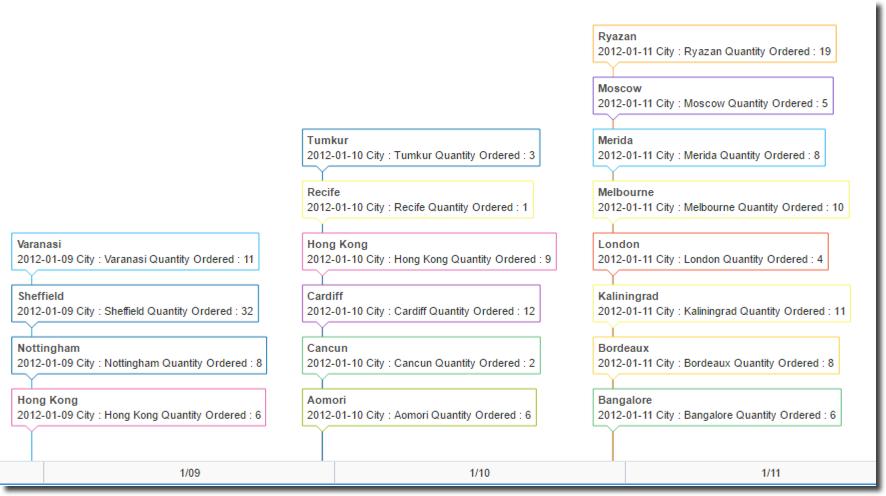
- Timeline: It's an effective way of showing time related facts, each fact is shown along a timeline, with one or more distinguishing attributes, the example shows the quantity shipped by day and city.
- Network Diagrams: Chord, Circular, Network and Sankey Diagrams are used to shows inter-relationship between elements
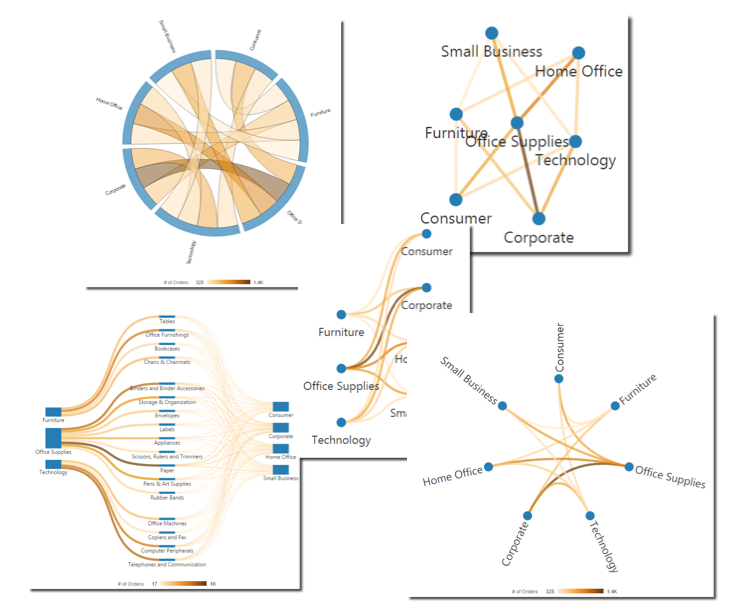
Other visual enhancements include a multi-canvas layout that can be exported with a single click and a hierarchical or gradient colouring for the charts.
Data Sources
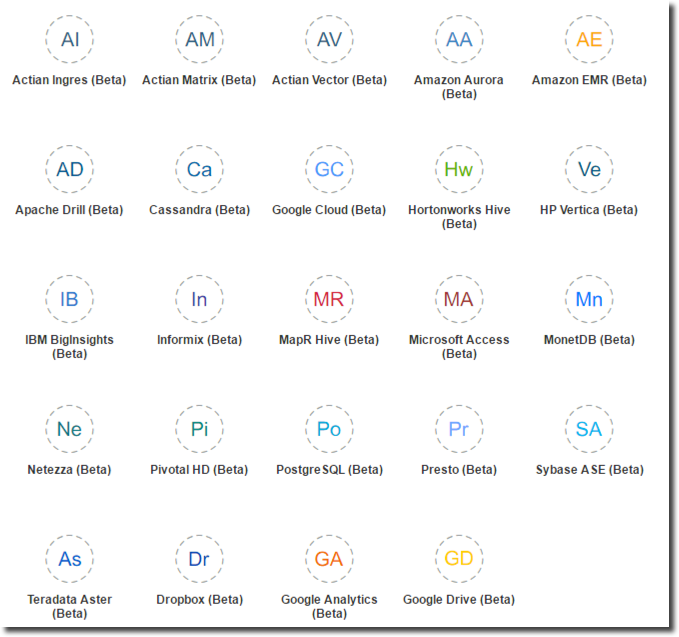
A lot of new data sources have been added to DVD, some of them still in beta phase. A bunch of new databases are now supported like Netezza, Amazon Aurora and PostgreSQL.
An interesting enhancement is the connection to Dropbox and Google Drive allowing DVD to source files stored in Cloud. Finally DVD's exposure to Big Data world has been enhanced by the addition of the connectivity to tools such as Apache Drill, Presto and Cassandra.
Excel Editing
Excel sheets used as data source now can be edited and the DVD project refreshed without the need of manually reloading the spreadsheet.
Data Flows
There is a new component in DVD called Data Flow allowing the end user some basic transformations of the data like joining two datasets (even if coming from different sources), filtering, aggregating, adding columns based on custom formulas and storing the result on the local file system.

In the example below two files coming from Hive (but the source can also be different) are joined and a subset of columns is selected and stored locally.

Data Flows can be stored in DVD and re-executed upon request. The list of Data Flows is available under Data Sources -> Data Flows. In the next blog post I'll show a typical Analyst use case in which Data Flow can help automating a series of data loading, cleansing and enriching steps.
Data Insights
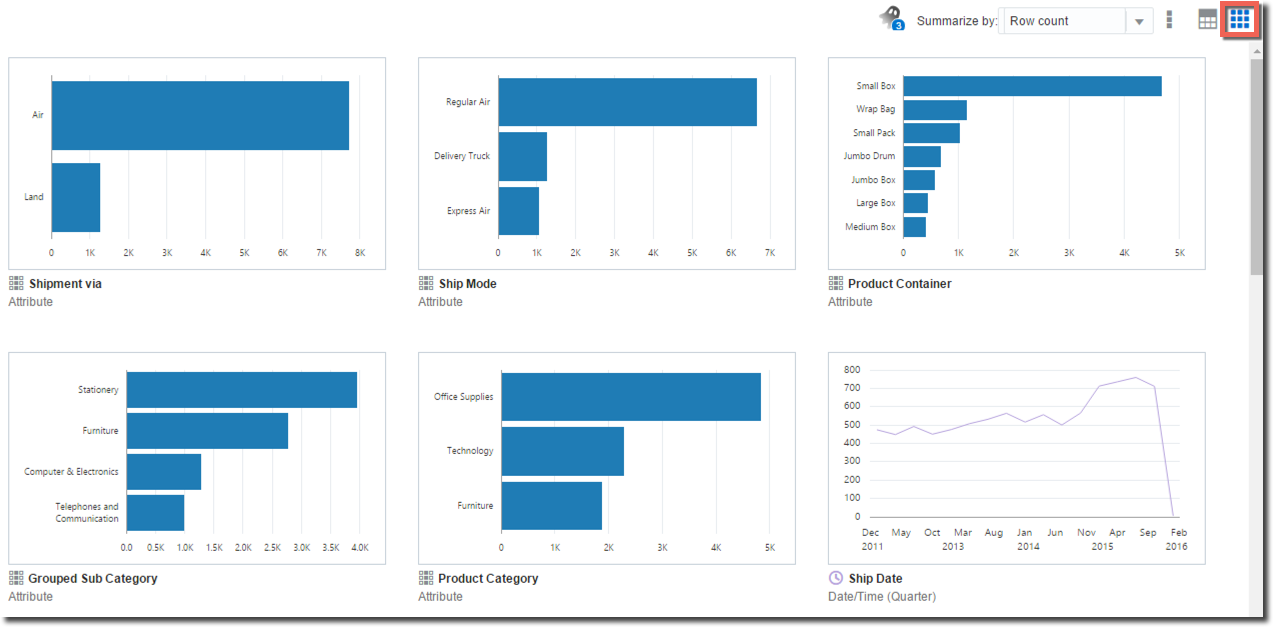
Data Insights provides a way of quickly understand the dataset available, by default it shows a series of graphs, one for every attribute, with the cardinality of each attribute's value. A drop down menu allows to show the same graphs based on any measure defined in the dataset.
BI Ask
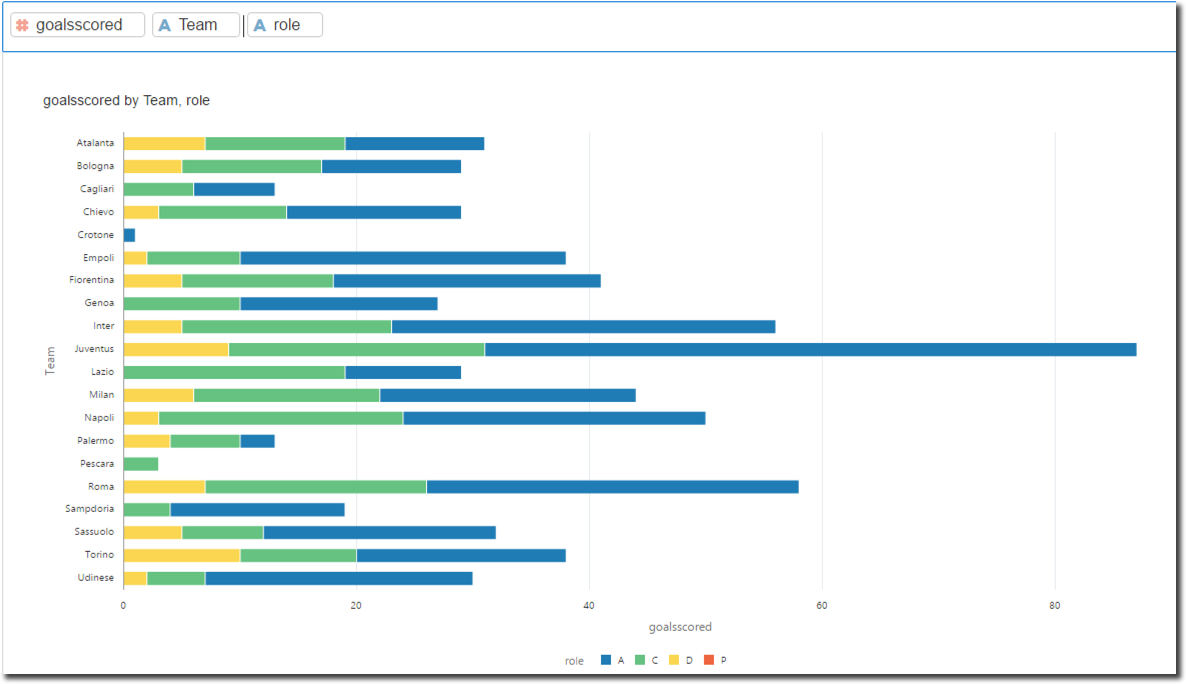
The new DVD version contains also BI Ask, providing the ability to create queries with natural language which is automatically interpreted and presented in suggested visualisations.
As you could read in this post the new version of Data Visualization Desktop adds a series of really interesting features enabling not only the data visualisation but also data exploration and wrangling. In the next blog post we'll see a typical DVD use case and how the new Data Flow option could be used to couple data coming from various sources.
OTN Appreciation Day : OBIEE’s BI Server
Oracle Technology Network (OTN) is one you'll be familiar with if you do anything with Oracle software, from downloading the installers, reading the documentation, using the online forums, 2 Minute Tech Tip videos, whitepapers, and much more!. Tim Hall (a.k.a. Oracle Base) blogged recently about a fun idea to recognise and show appreciation from the Oracle community for OTN. Across the world bloggers throughout the Oracle community will today be posting short articles about their favourite product features.
My favourite is OBIEE, and specifically the BI Server, or OBIS, or nqsserver as geeks come to lovingly know it. OBIEE's front end capabilities have taken leaps forward in recent years with the DV product line, but where OBIEE has never been caught lacking is in its super-powerful data modelling, query handling, and federation capabilities.
How cool is it that you can build a model of your business' data just once, and then iteratively develop the physical source of that data as needed? Maybe you start off directly against a source transactional system in order to deliver results to the business immediately. From that you can then evolve towards a physical star schema as performance or maintenance needs dictate. In all of this though, your reports remain the same, and your logical model remains the same. All you do is remap the physical. This is so powerful! It's something that my former Rittman Mead colleague Stewart Bryson wrote about here if you want to read more.
So that's modelling ... what about query handling? Sure, sometimes the "black box" that is OBIEE frustrates the heck out of technical users such as DBAs in how it generates queries. But the mind boggles when one realises what OBIEE can do as part of its standard functionality:
- Pick the most appropriate aggregate table to query against, without the end-user having to request it
- Query data from multiple databases, and return it to the end-user as a single analysis/report
- Query data from databases with limited analytical capabilities, and perform the required analytical functions
- And yes, this is a double-edged sword, because when used incorrectly OBIEE may do this when the database should...
- Query data from any JDBC or ODBC source!
- Query from any Excel file
- Stretching "OBIS" a bit here, as the datasetsvc is actually what makes this possible... ;)
So here's to another ~15 years of nqsserver, and here's to Oracle Tech Network. Cheers 🍻!
OBIEE12c – Upgrading to Version 12.2.1.1
INTRODUCTION
The new version of OBIEE 12c, 12.2.1.1 to be exact, is out, so let’s talk about it. It’s my intent that after reading this, you can expect some degree of comfort in regards to possibly doing this thing yourself (should you find yourself in just such a circumstance), but if not, feel free to drop us a line or give us a ring. It should be noted that Oracle documentation explicitly indicates that you’re going to need to upgrade to OBIEE version 12.2.1.0, which is to say you’re going to have to bring your 11g instance up to 12c before you can proceed with another upgrade. A colleague here at RM and I recently sat down to give the upgrade process (click there for the Oracle doc) a go on one of our hosted windows servers, and here’s the cut and dry of it. The examples throughout will be referencing both Linux and Windows, so choose how you’d like. Now, if you’ve gone through the 12c install process before, you’ll be plenty familiar with roughly 80% of the steps involved in the upgrade. Just to get this out of the way, no, it’s not a patch (in the sense that you’re actually going through the OBIEE patching process using OPatch). In fact, the process almost exactly mirrors a basic 12c install, with the addition of a few steps that I will make darn sure we cover in their entirety below. Speaking of which, I’m not going to do a play-by-play of the whole thing, but simply highlight those steps that are wholly unfamiliar. To provide some context, let’s go through the bullet points of what we’ll actually be doing during the upgrade.
First, we’ll make sure we have a server appropriate, supported version of java installed (8_77 is the lowest version) and that this guy corresponds to the JAVA_HOME you’ve got set up.
Next, we’ll be running the install for the WebLogic server into a NEW oracle home. That’s right, you heard me. A. new. oracle. home.
After that, we’ll be running a readiness check to make sure our OBIEE bits won’t run into any trouble during the actual upgrade process. This checks all OBIEE components, including those schemas you installed during the initial install process. Make sure to have your application database admin credentials on hand (we’ll talk about what you need below in more detail). The end of this step will actually have us upgrade all those pieces the readiness checker deems worthy of an upgrade.
Next, we’ll reconfigure and upgrade our existing domain by running the RECONFIGURATION WIZARD!!!!! and upgrade assistant, respectively.
Lastly, we’ll start up our services, cross our fingers, hold onto our four leaf clovers, etc.. (just kidding, at least about that last part).
Before we begin, however, let’s check off a few boxes on the ‘must have’ list.
Download all the files here, and make sure you get the right versions for whatever kind of server your version of OBIEE hangs out in. The java version will be 8_101 which will work out just fine even though the minimum needed is 8_77.
Get those database credentials! If you don’t know, drop everything and figure out how you’re going to access the application database within which the OBIEE 12c schemas were installed. You’ll need the user name/pass for the SYS user (or user with SYS privileges), and the database connection string as well, including the service name, host, and port.
Make sure you have enough disk space wherever you’re installing the upgrade. The downloads for the upgrade aren’t small. You should have at least 150GB, on a DEV box, say. You don’t want to have to manage allocating additional space at a time like this, especially if it involves putting in a ticket with IT (wink wink)! Speaking of which, you’ll also need the server credentials for whichever user 12c was installed under. Note that you probably don’t need root if it was a linux machine, however there have been some instances where I’ve needed to have these handy, as there were some file permission issues that required root credentials and were causing errors during an install. You’ll also need the weblogic/obiee admin user (if you changed the name for some reason).
Lastly, make sure you’re at least a tad bit familiar with both the path to the oracle and to the domain home.
SETTING UP JAVA
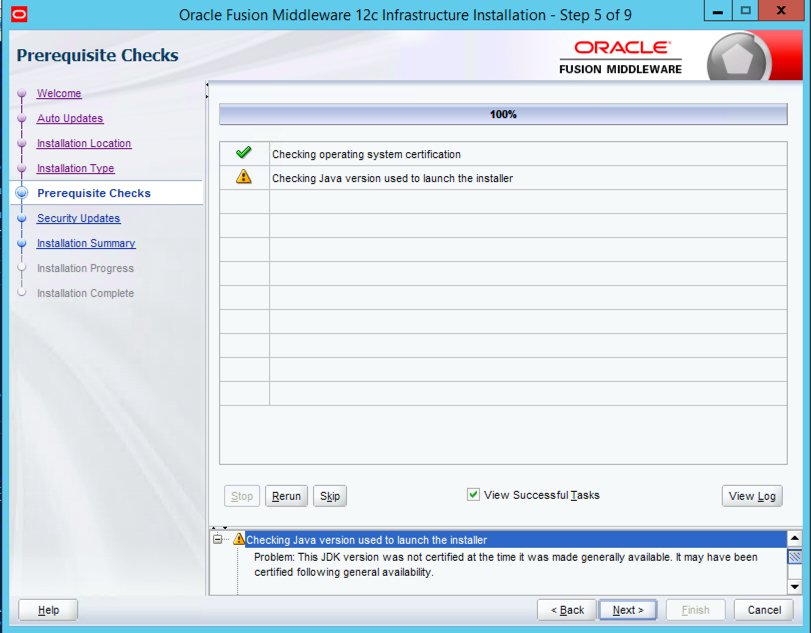
After downloading the version of Java you need, go ahead update it via the .rpm or .exe, etc… Make sure to update any environment variables you have set up, and to update both the JAVA_HOME variable AND the PATH to reference the new Java location. As stated above, at the time of this blog, the version we used, and that is currently available, is 8_101. During the upgrade process, we got a warning (see below) about our version not being 8_77. If this happens to you, just click Next. Everything will be alright, promise.
A NEW HOME FOR ORACLE
Did you click the link to the upgrade doc yet? If not, do so now, as things are about to get kind of crazy. Follow along as we walk through the next steps if you’d like. First, stop services and disable the SSL like it tells you to. Then, start OBIEE services back up and then run the infrastructure jar (java -jar fmw_12.2.1.1.0_infrastructure.jar) for the WebLogic server install. Again, I’m not going to go pic by pic here as you can assume most everything resembles the initial 12c install process, and this part is no different. The one piece of this puzzle we need to focus on is establishing a new oracle home. After skipping those auto updates, move onto step 3 where we are, in fact, going to designate a new oracle home. You’ll see that, after completing the WebLogic install, we’ll have a bunch of updated feature sets, in addition to some new directories in our 12.2.1.1 oracle home. For example, if your original home is something like:
/u01/app/oracle/fmw
change it to:
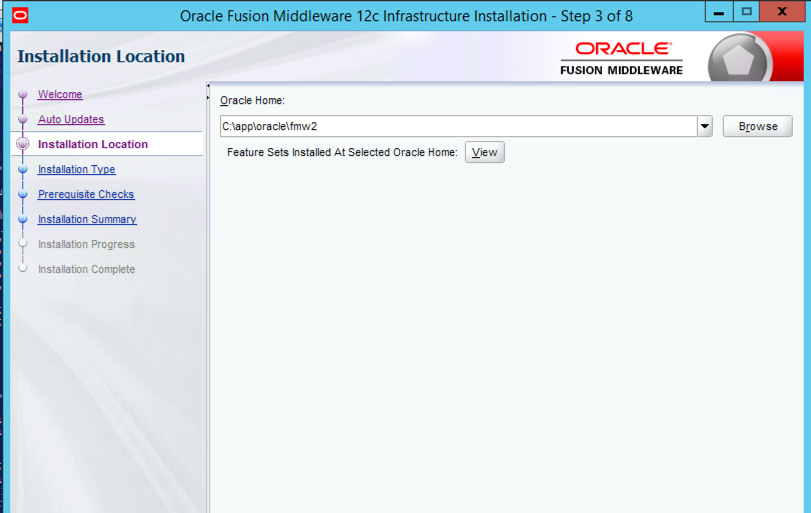
when it asks you to enter a new one.
Breeze through the rest of the steps here, and remember to save that response file!
UPDATING OBIEE
Unzip both of the fmw_12.2.1.1.0_bi_linux64_Disk#_#of2.zip files, making sure that your OBIEE install files are in the same directory. For windows, this will be the executable from the first zip file, and the zip file from the second part of disk 1. Execute the binary (on linux) or .exe, going through the usual motions and then in step 3, enter the NEW oracle home for 12.2.1.1. In the example above, it would be:
/u01/app/oracle/fmw2
for Linux, and likewise, for Windows:
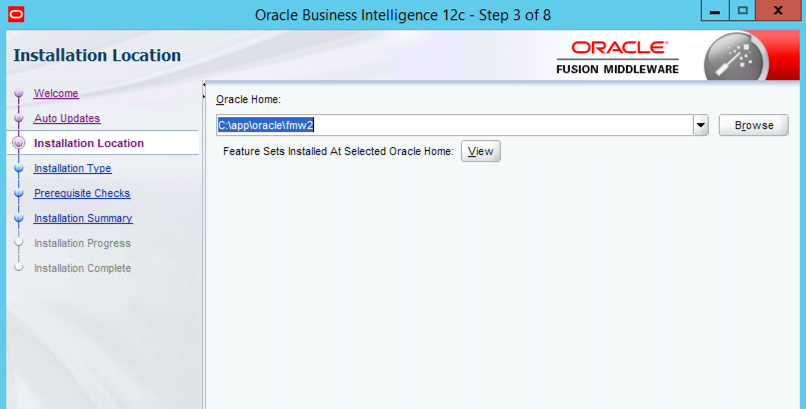
Again, there isn’t too much to note or trap you here beyond just making sure that you take special care not to enter your original oracle home, but the one you created in the previous section. Proceed through the next steps as usual and remember, save your response file!
UPDATING THE 12C SCHEMAS - USING THE READINESS CHECKER AND UPDATE ASSISTANT
Run the readiness checker from:
NEW_ORACLE_HOME/oracle_common/upgrade/bin/ua -readiness
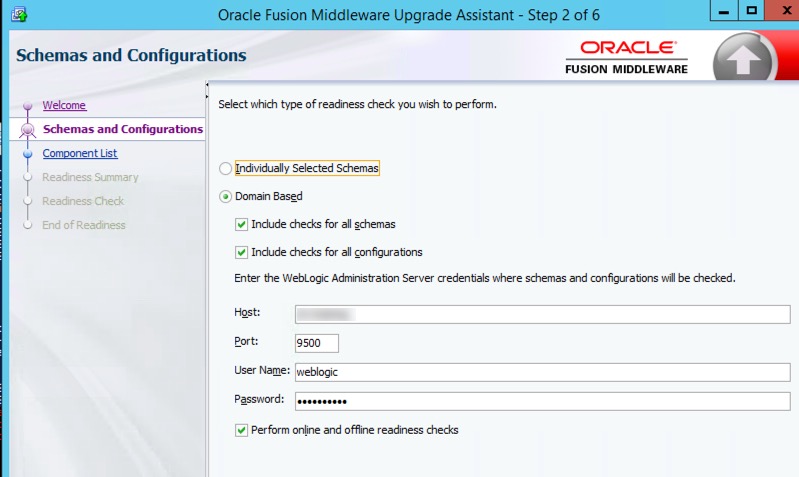
This next series of steps will take you through all the schemas currently deployed on your application database and confirm that they won’t explode once you take them through the upgrade process. In step 2 of 6, make sure that you’re entering the port for EM/Console (9500 by default). Remember when I said you’re going to need the DB credentials you used to install 12c in the first place? Well here’s where we’re going to use them. The readiness checker will guide you through a bunch of screens that essentially confirms the credentials for each schema installed, and then presents a report detailing which of these will actually get upgraded. That is to say, there are some that won’t be. I really like this new utility as an extra vote of confidence for a process that can admittedly be oftentimes troublesome.
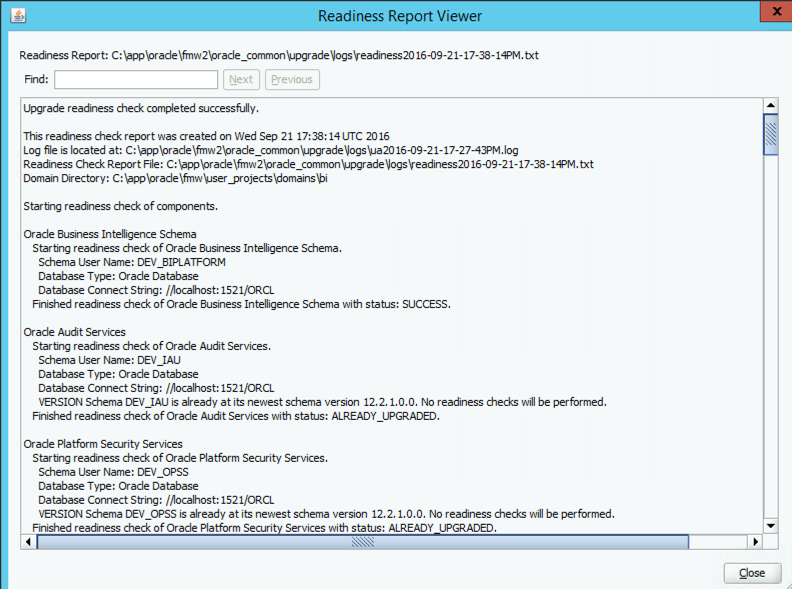
Once you’ve validated that those schemas ready for update, go ahead and stop OBI12c services using the EXISTING oracle home.
Pro tip: they’ve made it super easy to do this now by just pointing your bash_profile to the binaries directory in OBIEE’s bitools folder (ORACLE_HOME/user_projects/domains/bi/bitools/bin). After logging this entry in your profile, you can simply type start.sh or stop.sh to bring everything up or down, not to mention take advantage of the myriad other scripts that are in there. Don't type those paths out every time.
I digress… After the services come down, run the upgrade assistant from within the NEW oracle home, as below:
Citing the previous example:
NEW_ORACLE_HOME/oracle_common/upgrade/bin/ua
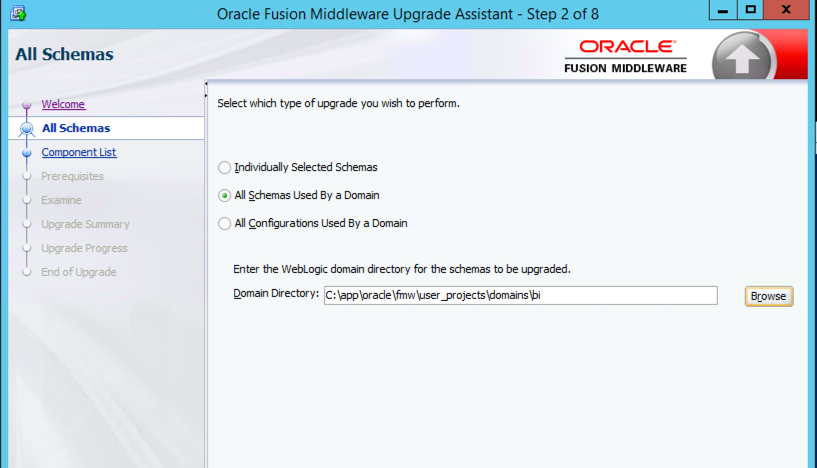
After bringing up the install dialogue box, move on to step 2, and select the All Schemas Used by a Domain option (as in the example above), unless of course you’d like to hand select which ones you’d like to upgrade. I suppose if you were thinking about scrapping one you had previously installed, then this would be a good option for you. Make sure the domain directory you specify is from your existing/old 12c instance, as below:
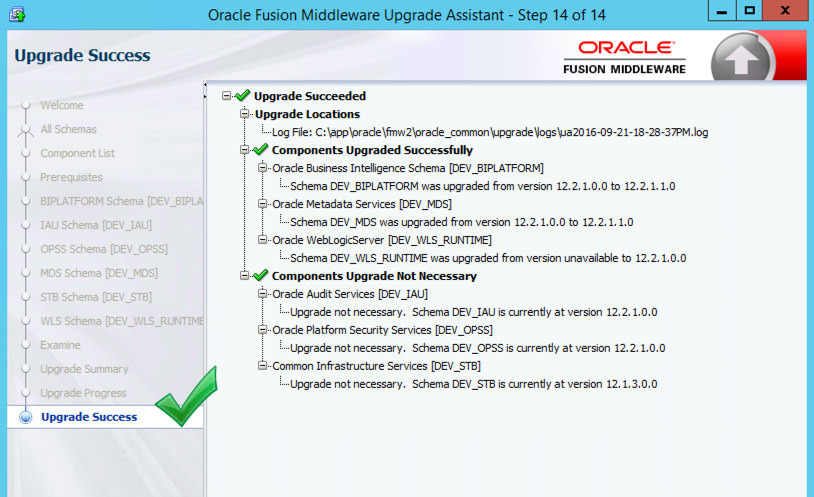
Move through the next series of steps, which are more or less self explanatory (no tricks here, promise), once again validating connection credentials until you get to step 12. As always, save the response file, select Upgrade, and then watch the magic happen,….hopefully. Congratulations, you’ve just updated your schemas!
WHO INVITED A WIZARD TO THE PARTY? - RECONFIGURING THE BI DOMAIN AND UPDATING THE BI CONFIGURATION
Like I said before, I won’t be covering every single step of this process i.e, doing the map viewer portion, which means you’ll have to still consult the…oracle, on some of this stuff. That being said, don’t gloss over backing up the map viewer file..you have to do it. This is simply an attempt to help make the upgrade process a little easier to swallow and hopefully make some of the more confusing steps a bit clearer. Moving on. Guess what? It’s time to run another series of dialogue boxes. Beats the heck out of scripting this stuff though, I guess. Open up the RECONFIGURATION WIZARD!!!!! as instructed in the documentation, from the location within your NEW oracle home. The first step will prompt us for the location of the domain we want to upgrade. We want to upgrade our existing 12c domain (the old one). So type that in/browse for it. Right now.
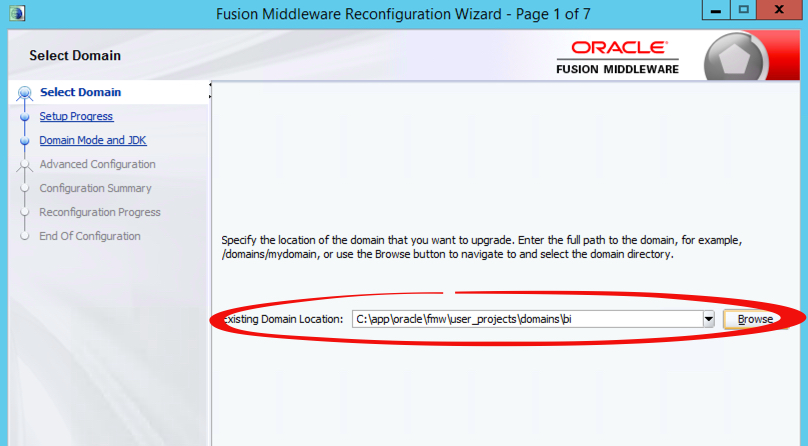
Validate your java version and location in step 3 and then click your way through the next few screens, ensuring that you’ve at least given your stamp of approval on any pre-filled or manually filled entries in each dialogue box. Leave step 7 alone and click Next to get to the screen where we’re actually going to be starting the reconfiguration process. Click through and exit the RECONFIGURATION WIZARD!!!!!
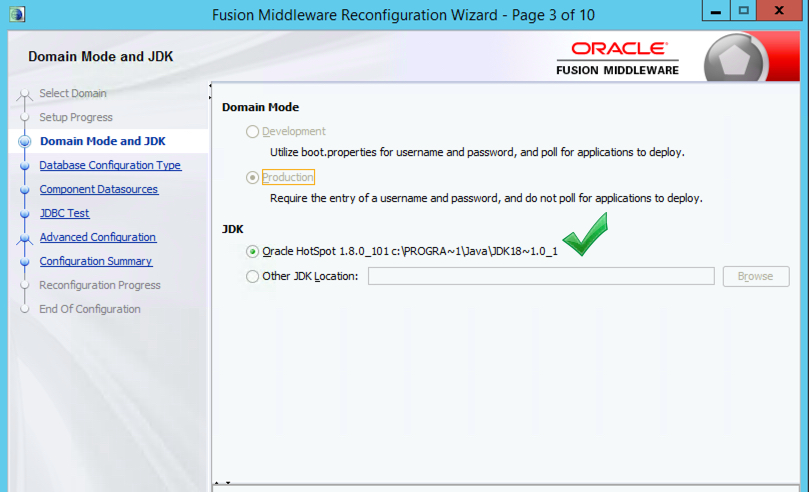
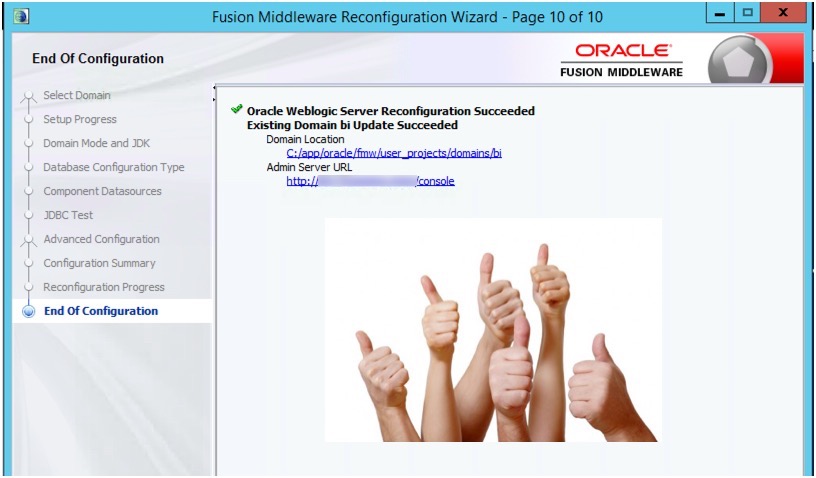
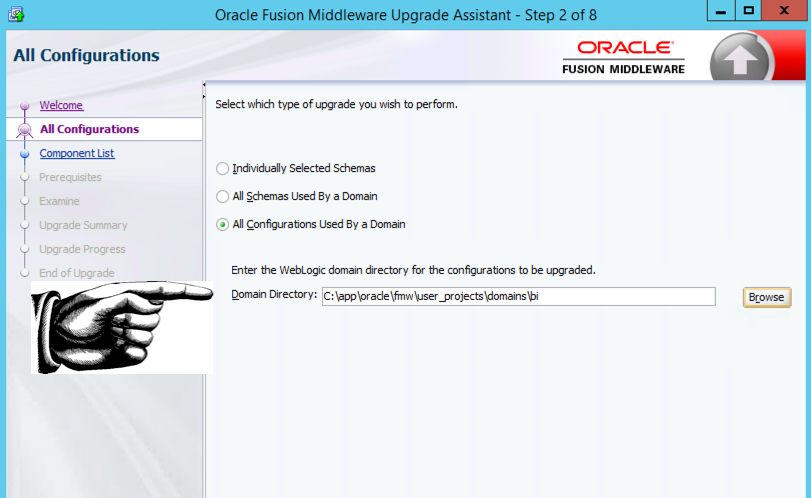
Don’t forget to restore the map viewer config file at this point, and then launch the configuration assistant again, this time selecting the All Configurations Used By a Domain option in step 2. Make sure you’ve entered the location of the existing 12c domain in this step as well, and NOT the one created under the new oracle home.
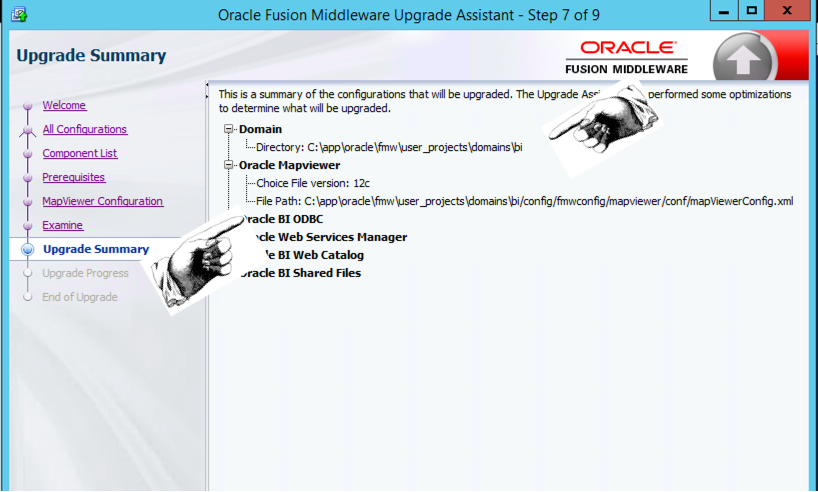
Click through the next steps, again, paying close attention to all prompts and the location for the map viewer xml file. Verify in step 7 that the directory locations referenced for both domain and oracle map viewer are for the existing locations and NOT those created by the install of the update.
WRAPPING UP AND NOTES
You can now boot up ssl (as below) and then start OBIEE services.
DOMAIN_HOME/bitools/bin/ssl.sh internalssl true
Note: if you have tnsadmin or ldap.ora, place copies under NEW_ORACLE_HOME/network/admin
You can ignore the new oracle home created at this time, as, in my opinion, we’re going to have to do something similar for any following updates
for 12c. What did you think of the upgrade process and did you run into any issues? Thanks so much for reading, and as always, if you find any inconsistencies or errors please let us hear about them!


